The portal is an essential tool for organizing and sharing documents in a centralized manner. By adding documents to specific folders within the portal, you can ensure easy access and collaboration for all relevant parties. This article will guide you through the process of adding documents to the portal and enabling visibility for clients.
Adding Documents to a Portal Folder
To add documents to the portal, add them to any folder that has been set up as a portal folder in Admin. You'll notice these special folders by their unique icon in the Documents area for each matter.
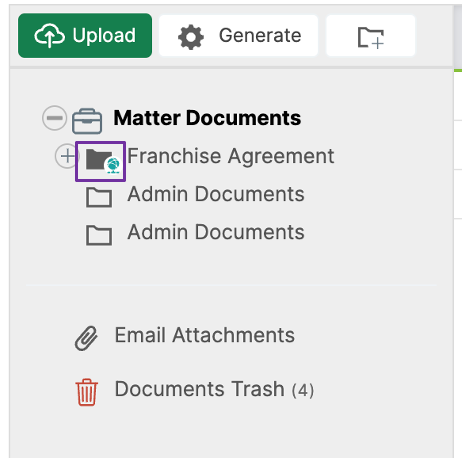
- Navigate to the Documents tab within the matter.

Now, you have two options:
First, you can click and drag an already uploaded document into a portal folder.
Alternatively, you can click the upload button, select the desired document/file, choose the portal folder you want to place it in, and click "done."

This automatically triggers an email notification to the client, informing them that a new document has been added to the portal. They can conveniently access the portal to view and retrieve the document.
Accessing Sub-Folders
If you have created sub-folders within a matter, it is important to ensure that clients can view the documents stored in them. To enable this, you have two options: either move all the documents to the main Client Documents folder, or create and enable each sub-folder individually in the workflow admin section.
To enable sub-folders:
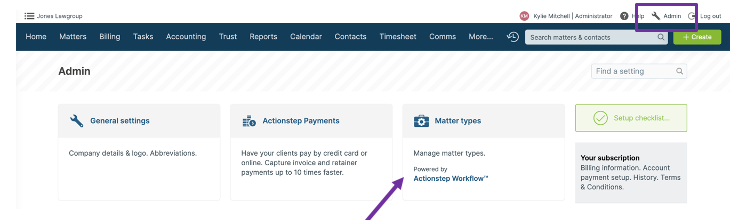
Head to Admin menu (Found at the top right of your Actionstep screen)
Click on the Matter Types tile
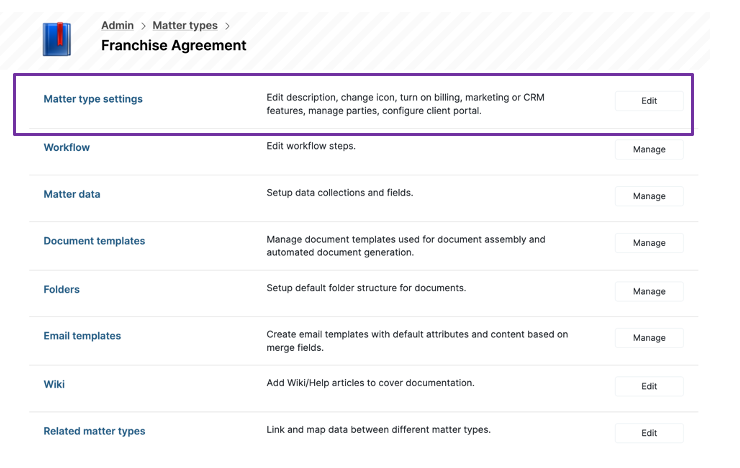
Select the relevant Matter Type with the sub-folders

Navigate to the Folders section and add the desired sub-folders

Click on each sub-folder and choose "Push to all Actions" to enable its visibility across all related actions

Enabling Portal Access for Folders
Once you have added and configured the sub-folders, you need to enable portal access for these new folders.
Return to the Matter Type Settings for the specific matter type
Scroll down until you reach the Client portal section

Add the newly created folders, select the appropriate permissions, and click "Save" to apply the changes

By following these steps, you can easily add documents to the portal and ensure that clients can access and collaborate on important files. Organizing documents within portal folders and enabling visibility for sub-folders enhances efficiency and streamlines document management for matters of various types.
Please note - no email notifications will be sent to you when a client uploads a document or sends a message via the portal.Was this article helpful?
That’s Great!
Thank you for your feedback
Sorry! We couldn't be helpful
Thank you for your feedback
Feedback sent
We appreciate your effort and will try to fix the article